- After logging in at the Management App or https://app.dikauri.com, look on the left menu, choose “Category” under the “Menus” section. The Categories should be created first before creating menu items.
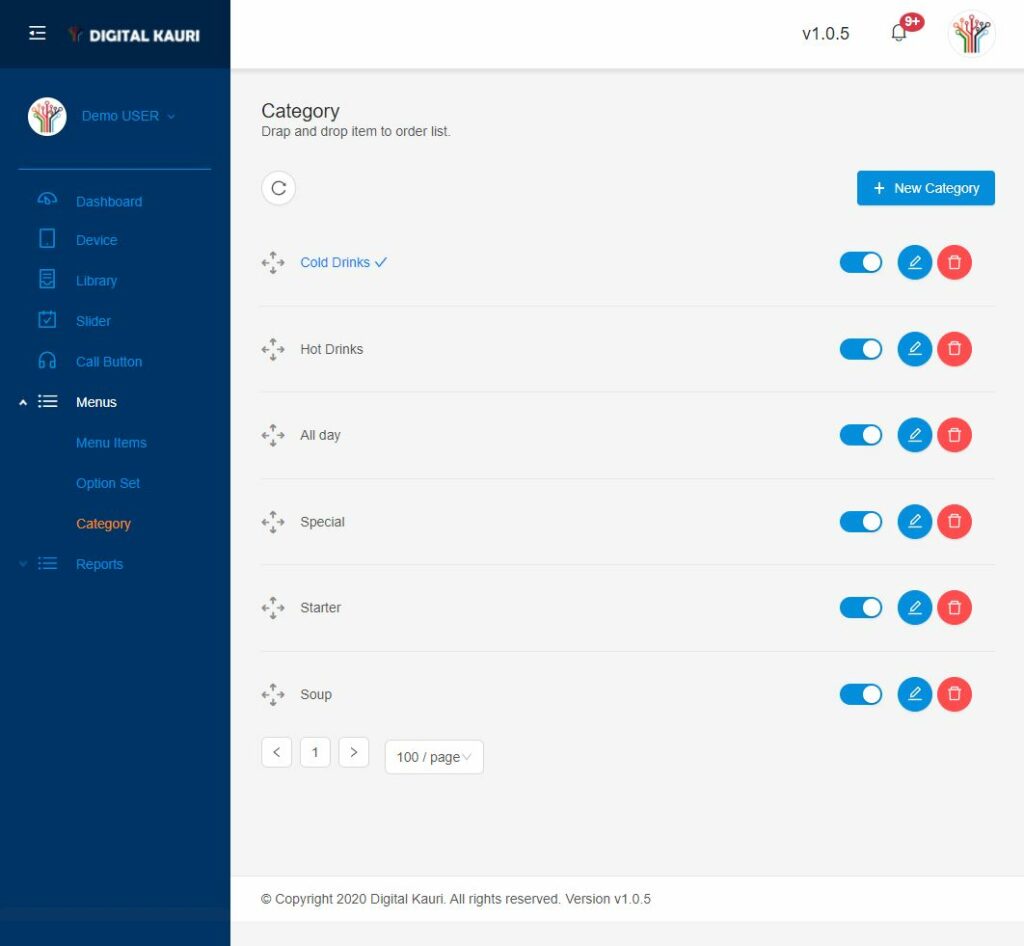
- Simply create new category by clicking on the blue button “Create new category” on the top right screen.
- Fill in the category name and click “Add”.
- You can choose this is a default category or not. The default category is what will be displayed automatically every time people open the Digital menu on TABLER devices.
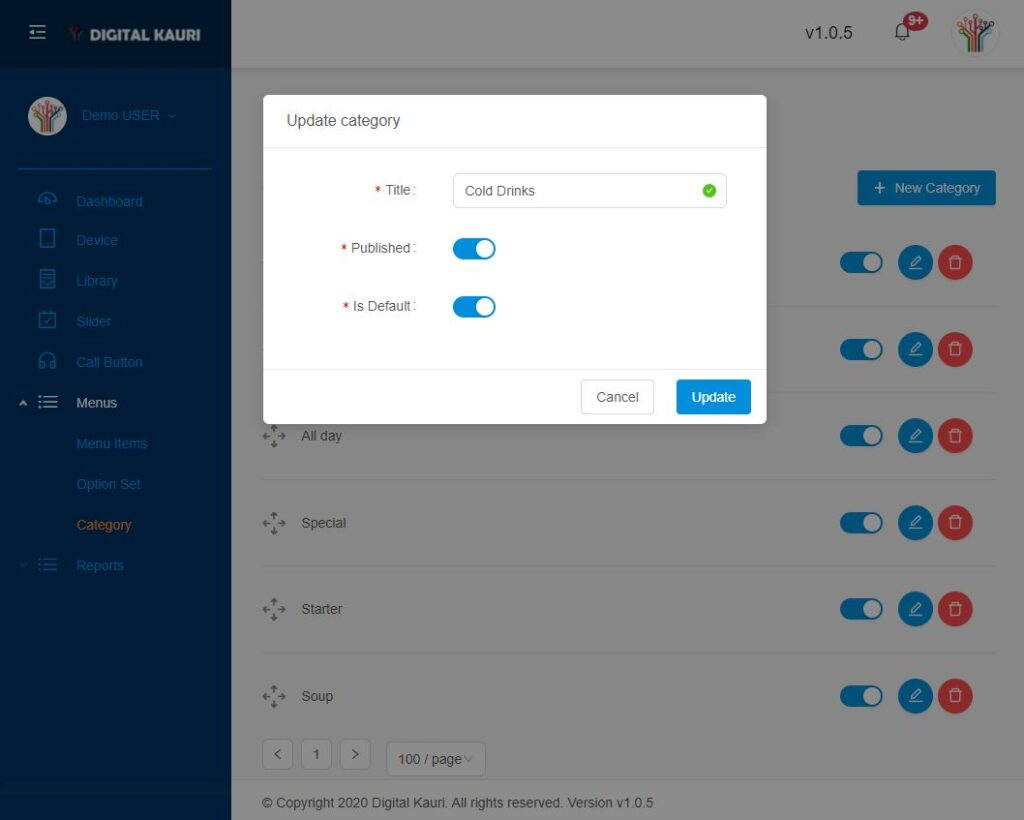
- After logging in at the Management App or https://app.dikauri.com, go to the “Category” under the “Menus” section on the left menu.
- Click on the edit button

- Now you can rename, turn onn/off or set it as the default.
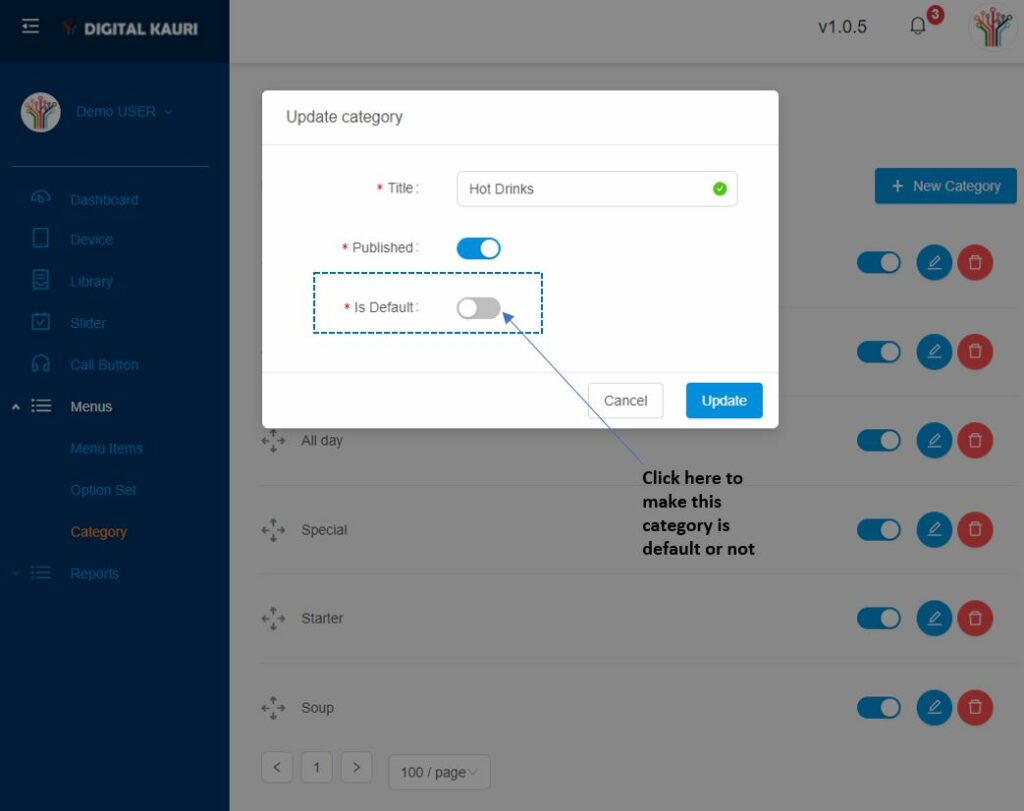
- After logging in at the Management App or https://app.dikauri.com, go to the “Category” under the “Menus” section on the left menu.
- Click on the edit button
- Now you can rename, turn onn/off or set it as the default.
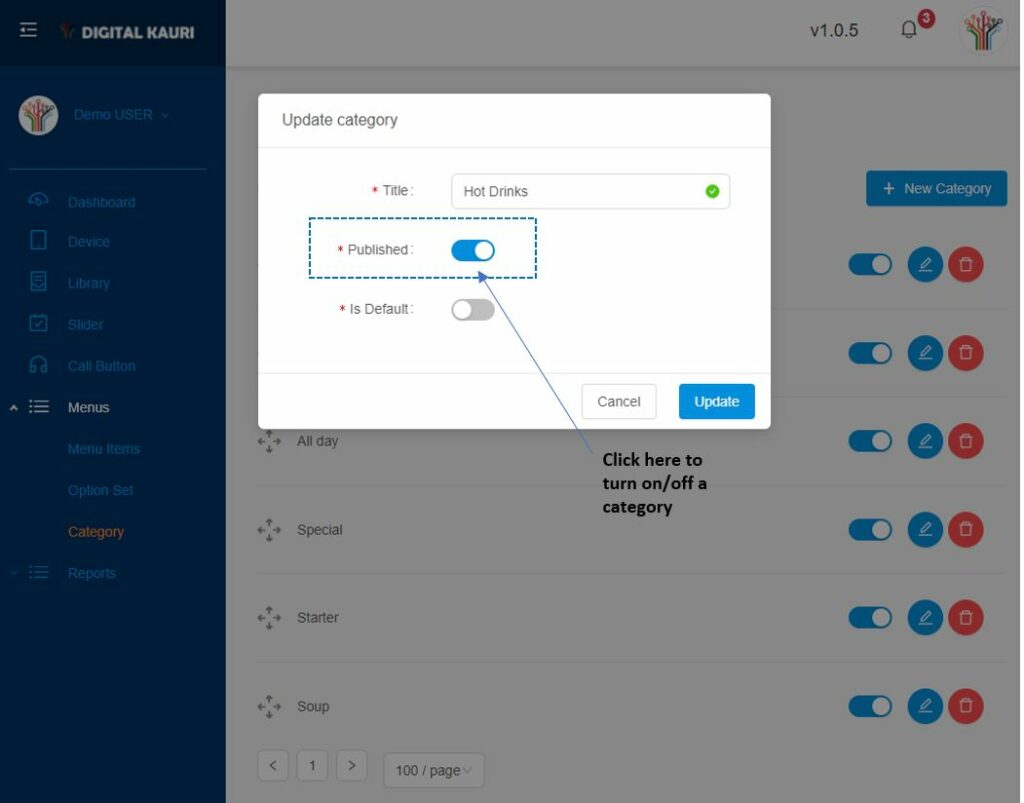
- After logging in at the Management App or https://app.dikauri.com, go to the “Category” under the “Menus” section on the left menu.
- To disable: Click on the edit button
- Click on the button “Published” to turn on/off a category.
- To delete: click on the button

- Confirm to delete. Please note that you can not recover or undo this action.
- Log in at the Management App or https://app.dikauri.com.
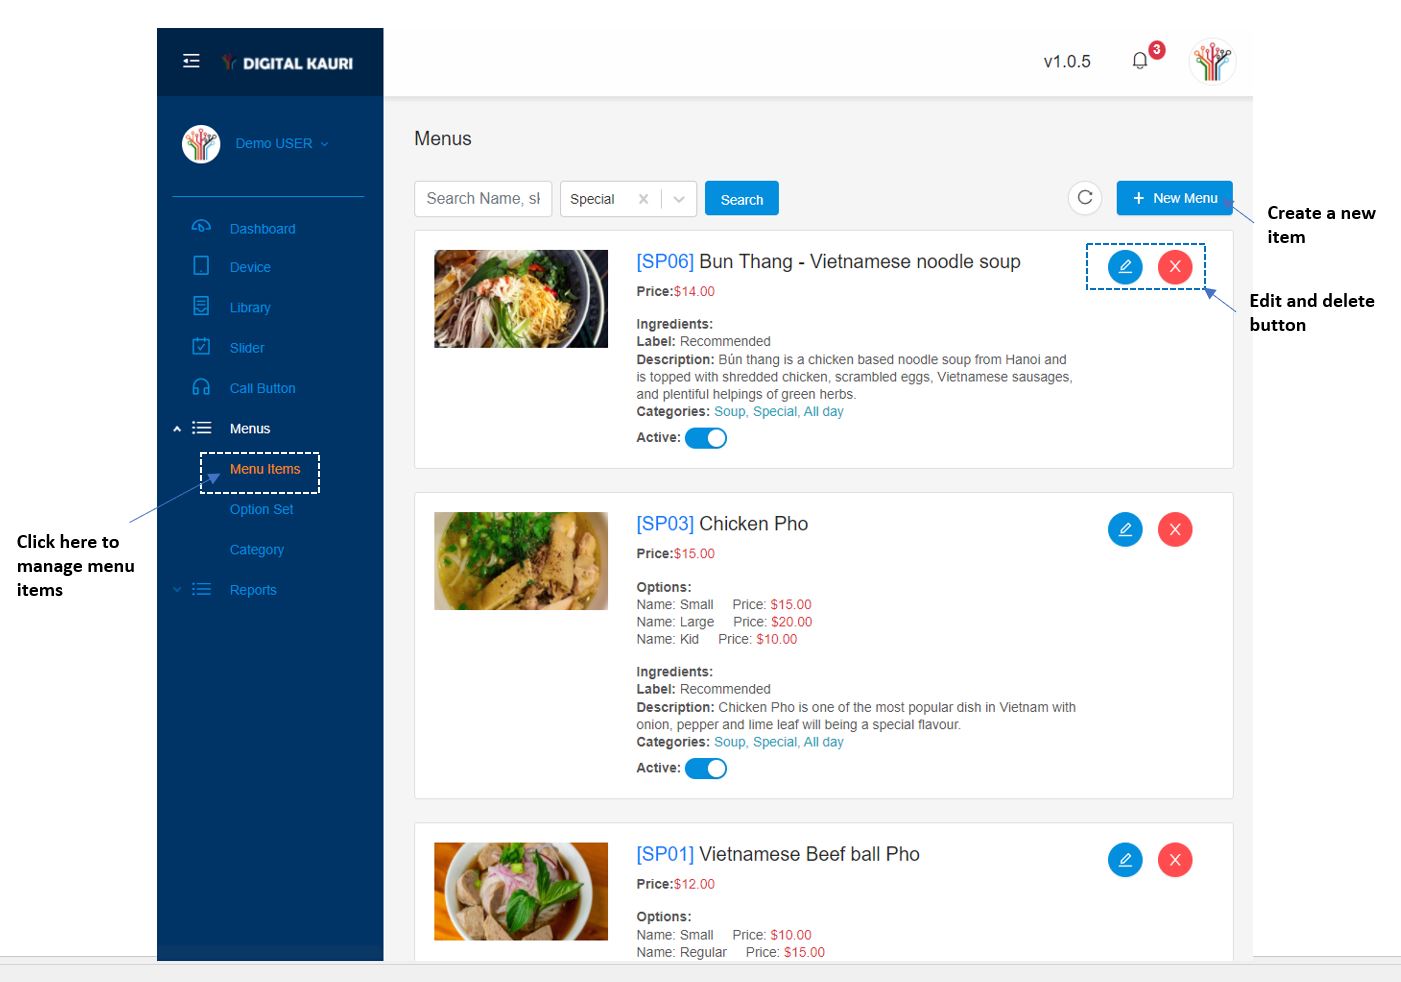
- Select Menus \Menu items on the left then click “New Menu” on the right screen and fill in all the necessary information, including: name, category, description, images.
It is important that you fill in all the information, it will keep your menu more professional.
DO NOT FORGET THE ALLERGY INFORMATION AS IT MIGHT BE REQUIRED BY LAW by inputting the Ingredient details.
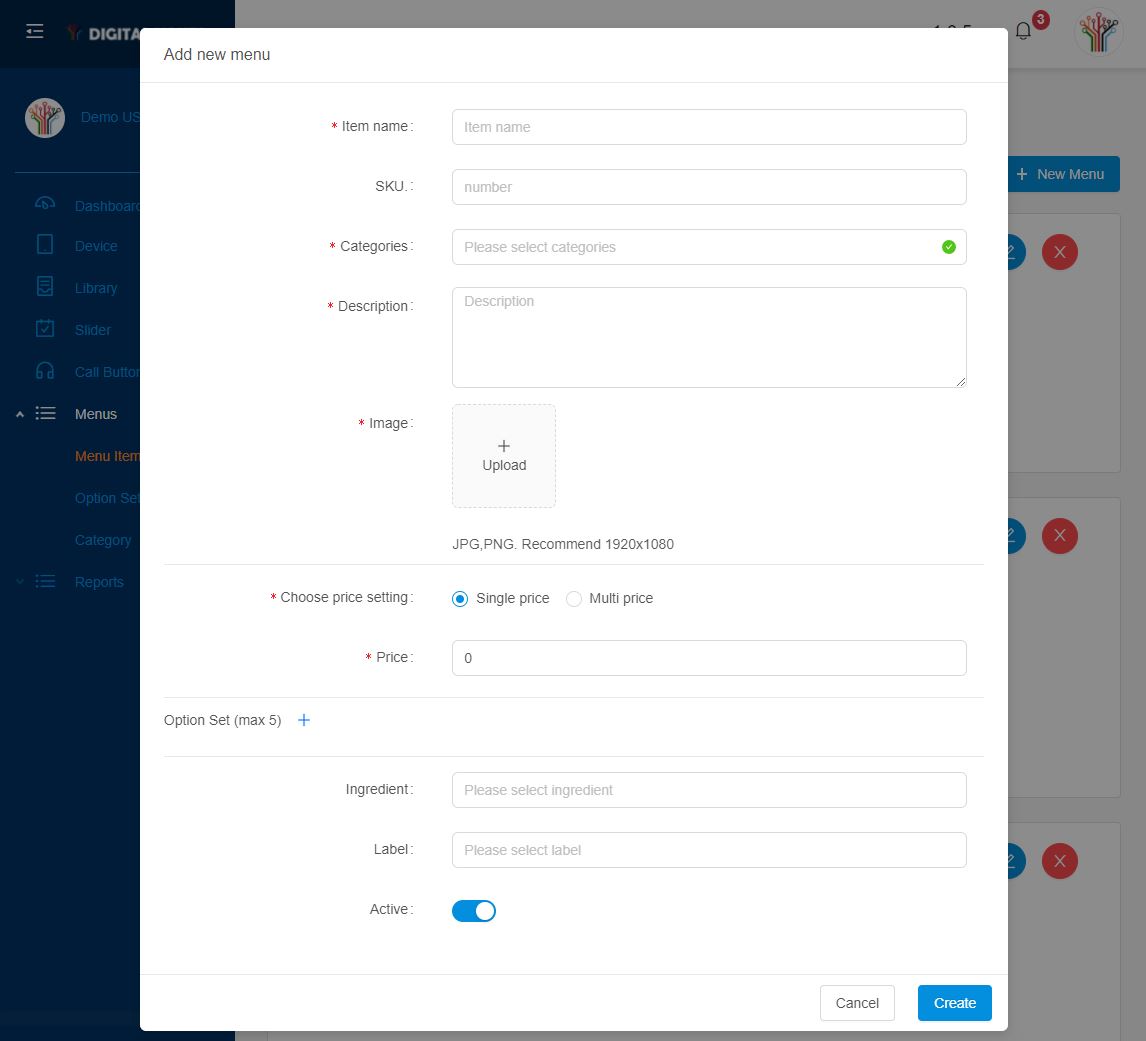
Explanation:
- Item name: Name of the item
- SKU: the code of the menu item. This code will display on the menu that can be used to replace the name of the meal when ordering or communicating.
- Categories: You can choose what Category this meal/item belongs to. One menu item can be in multi categories.
- Description: the details of the menu item.
- Images: a good photo worth a thousand words, please choose the photo carefully. We support multi photos for one item.
- Set price: There are 2 options for when you create a new menu item: Single price, Multi price. Click on “Multi price” and fill in multiple prices that you want.
- Option set: Option Set allows you to group products into a set of different choices then you can assign to any item in the menu. For more details, please refer Option set guide below
- Turn On/off a menu item: There is an on/off button in each of the menu item, you can simply click on it to switch on/off the item, it will control how the items appear on the menu or not.
- Log in at the Management App or https://app.dikauri.com.
- Select Menu \ Menu items on the left panel
- Click on the button Edit to modify details
- Log in at the Management App or https://app.dikauri.com.
- Click on Menu \ Menu items you will see the list of existing items.
- Click on the button to delete an item.
Instead of set options for each invidual menu item, you can create Option Set and assign it to any suitable item.
For example, as can see in the screenshot below, you can make an option set for how the egg will be cooked: poached. fried, scrambled. This option set can be assigned to many breakfast meals.
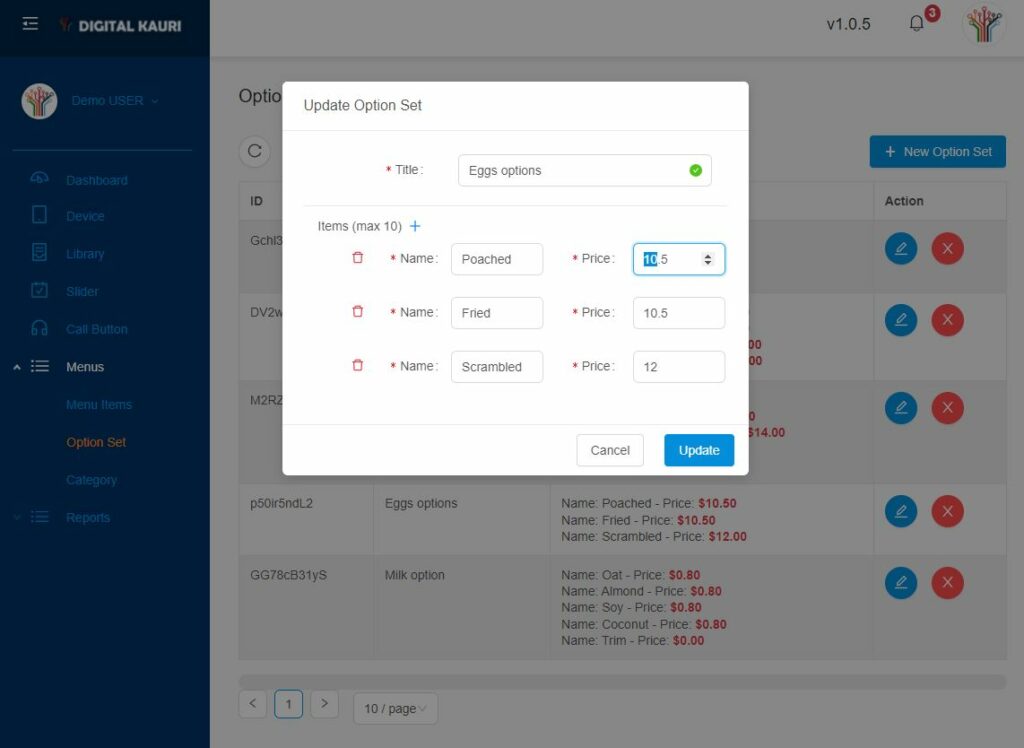
This saves time for you.
One item can have more than one Option Set and you can set it is a multi-choices or only-one option.
ATTENTION: THE FINAL PRICE = ITEM PRICE + OPTION PRICE.
- Log in at the Management App or https://app.dikauri.com.
- Select Menu \ option set on the left panel
- To edit an existing set: click on the Edit button
- Adjusting details
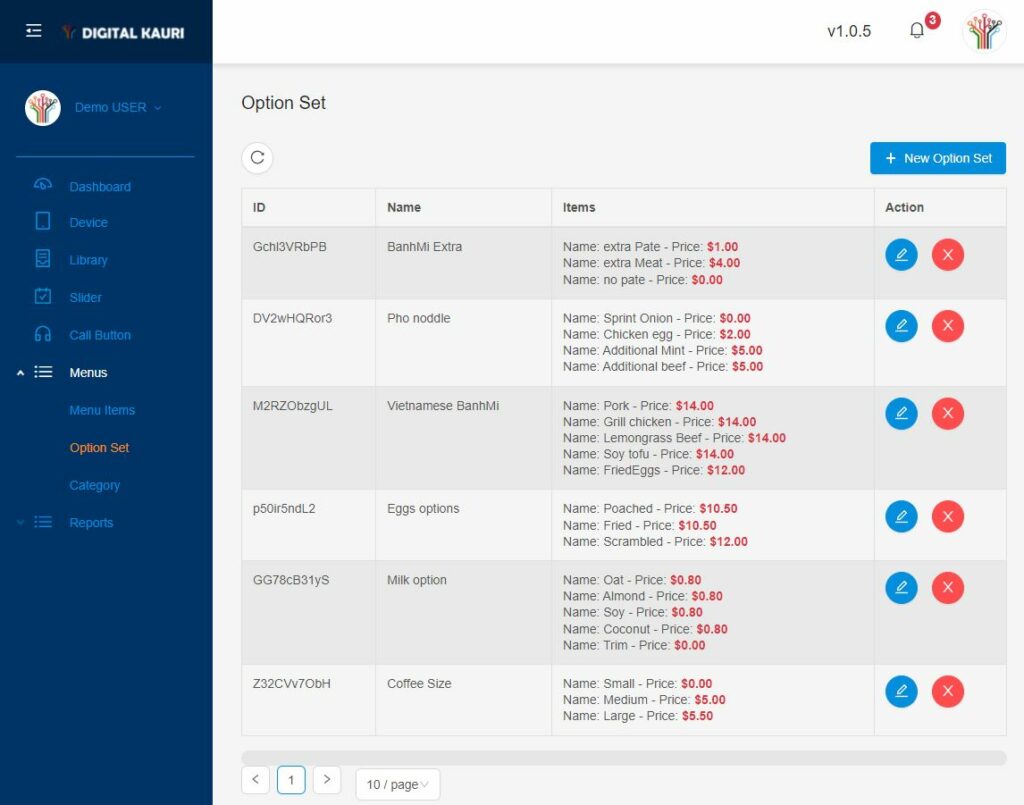
- To create a new Option Set: Click on the button “+ New Option Set“, fill in the details information.
- Then click on the button “Create” to complete.